AUTOMATIC FLOOR SHIFTER INSTALLATION GUIDE
03-05 Honda Civic
*Please read this all the way through before doing this install!*
| We will not be held responsible for any mistakes, problems, or damage done to any part of your car. Follow this install guide carefully, and you should have no problems. If you are unsure about ANYTHING, please email us. We will help you out to the best of our ability. |
| Here Is What You Will Need: |
|
- Phillips head screw driver
- Flat head screw driver
- Teflon Tape
|
Remove top plastic bezel. There are four tabs that secure the bezel to the rest of the assembly. Pry it off by simply wedging fingers underneath the front portion and moving your fingers all the way to the back of the bezel until it lifts off. Do not use a screwdriver as this will scratch the plastic. Note the location of the hooks for later reinstallation.
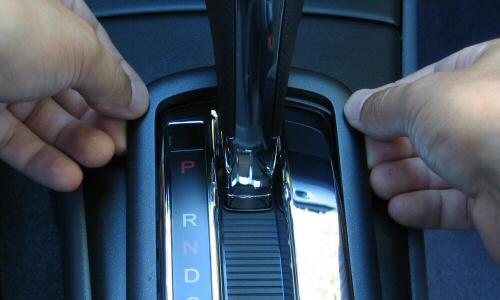

Remove top plastic cover. Starting from the top, wedge your fingers underneath the front and continue all the way to the back until it lifts off. Do not use a screwdriver as this will scratch the plastic.
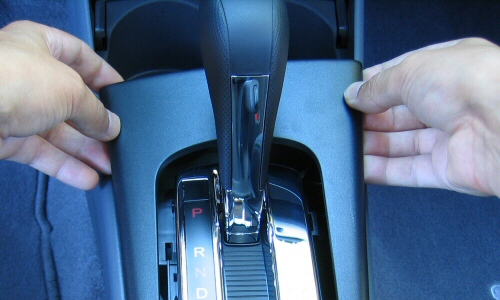
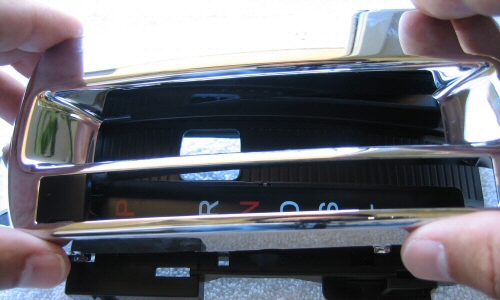
Here is what it will look like.

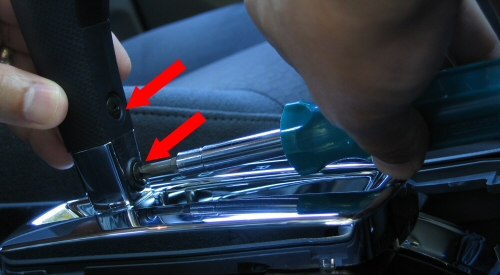
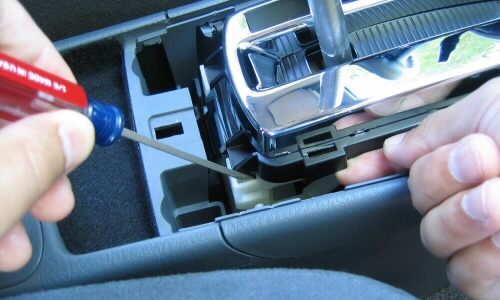
Set your parking brake on. Insert the ignition key and turn it to the on position so the sifter will unlock. Pull shifter all the way down. Remove the two phillips screws that secure the shift knob.
The shifter is secured in place by four plastic tabs – two in the front and two in the back. Unlatching the two hooks in the back is sufficient to remove the entire shifter assembly. The left picture below shows the rear drivers side tab. The right picture shows the rear passengers side tab.
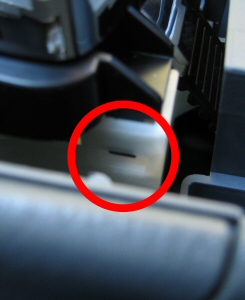 
Use a small flat head screwdriver in the slots (shown above.) Gently push the screwdriver inward to unlatch the tabs at the same time lifting up on the shifter assembly as shown. Do this for both the rear driver’s and passenger’s side tabs until the assembly comes loose.
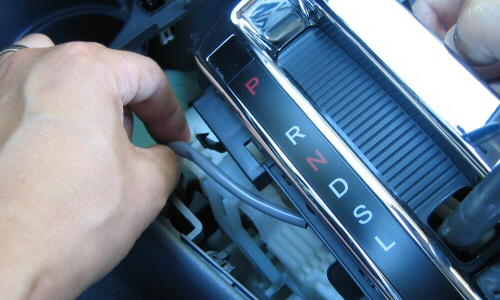
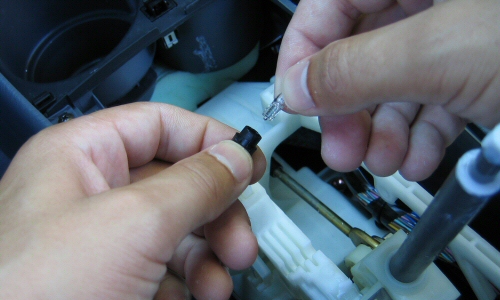
Once the two rear tabs are unlatched, lift the shifter assembly slightly and unlatch the two front tabs. Unhook the light bulb wire from the plastic wiring harness as shown.
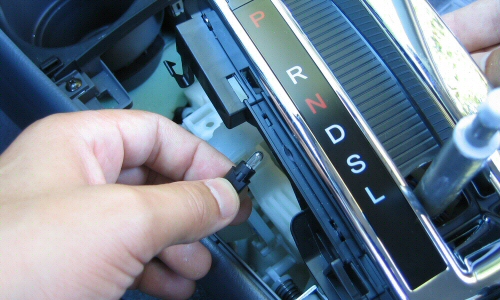
Remove the light bulb from the shifter. Just twist it 1/4 of a turn counter clockwise and pull it out.
Remove the stock bulb by pulling it straight out of the socket. Plug the wedge LED into the socket. Be careful not to push the LED too far into the socket as this may allow a contact to touch an area behind the resistor. Push it in deep enough that it is held in place securely but shallow enough that you can still see the resistor.
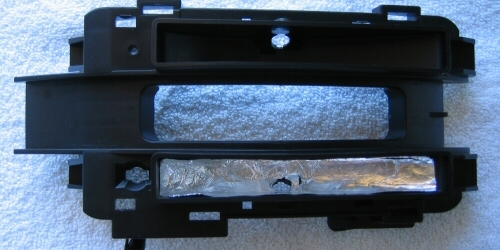
On the underside of shifter housing, there are four tabs that secure the top portion of the housing to the bottom portion. All four tabs will need to be unlatched.
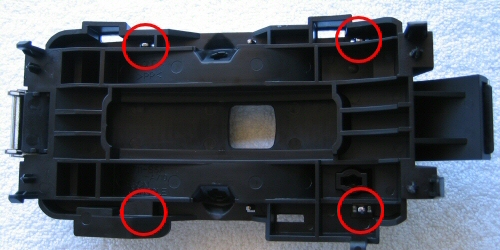
Using a small flat head screwdriver press inward on each tab while using your other hand to press in and pull out. Do this for each tab until the top separates from the bottom.
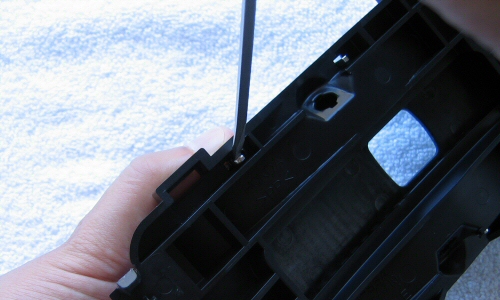
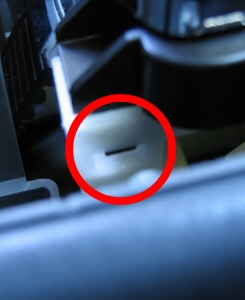
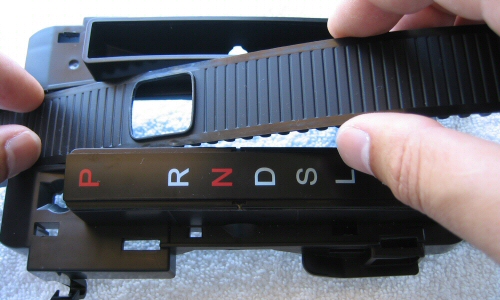
On the top of the housing that you removed. Pry off the indicator plate off with small flat head screwdriver.
The next 3 steps are optional, but it will improve the overall illumination. Line the area under the indicator panel with aluminum foil.
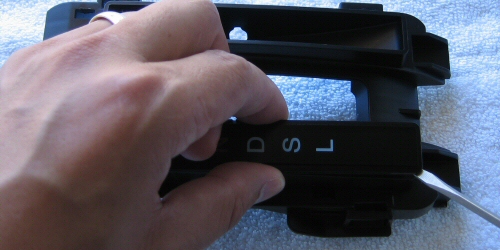
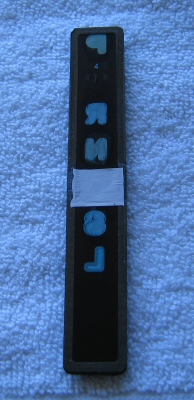
The letters on the indicator panel have two coats of paint: letters P and N have a blue coat on top of a red coat. The rest of the letters/numbers have a blue coat on top of a white coat. Use a sharp Xacto knife to gently and carefully scrape off the blue layer from all the letters. Be careful not to scrape off the white or red coats.
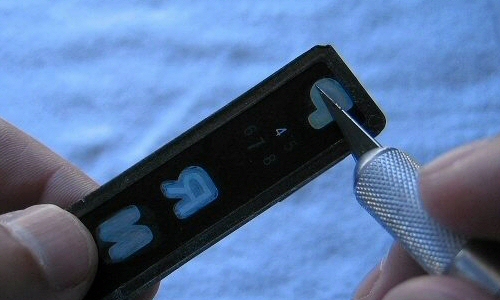
Place a small piece of teflon tape over letter D. The wedge LED will lie directly underneath this letter so this letter will light up brighter. Using the teflon tape will dim it down to make it the same brightness as the rest of the letters/numbers.
Re-attach the indicator plate.
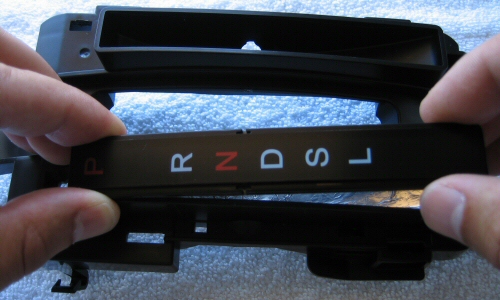
Re-attach the plastic dust cover.
Re-attach the top of the housing to the bottom of the housing.
Reassemble everything in reverse order.
|

 LED Technology
 Automotive Kits
 Eco-friendly
 LED Types
  Multiple Colors